This article will cover integrating Graphly’s Web Tracker with any Wordpress site. (IF YOU ARE USING OPTIMIZEPRESS PLUGIN, FOLLOW THIS ARTICLE HERE).
Setting Up the Web Tracker Integration in WordPress
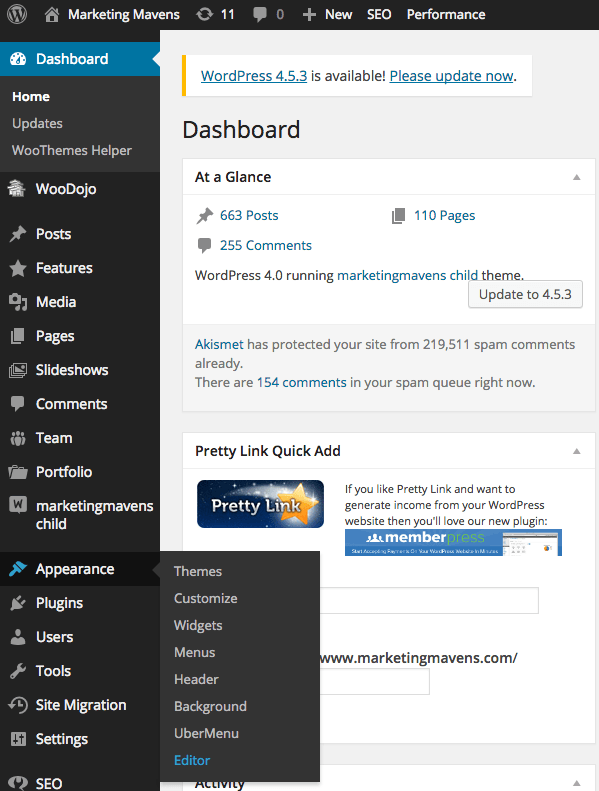
First, log into your Wordpress site. Then hover over Appearance on the side menu and click on “Editor“.

Now navigate to the theme that contains your Header.php file.


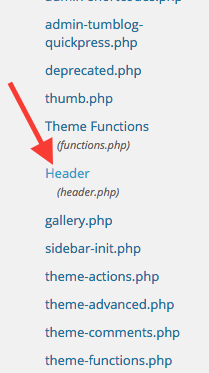
Scroll down to and click on the “Header.php” file that will appear on the right side of the screen.

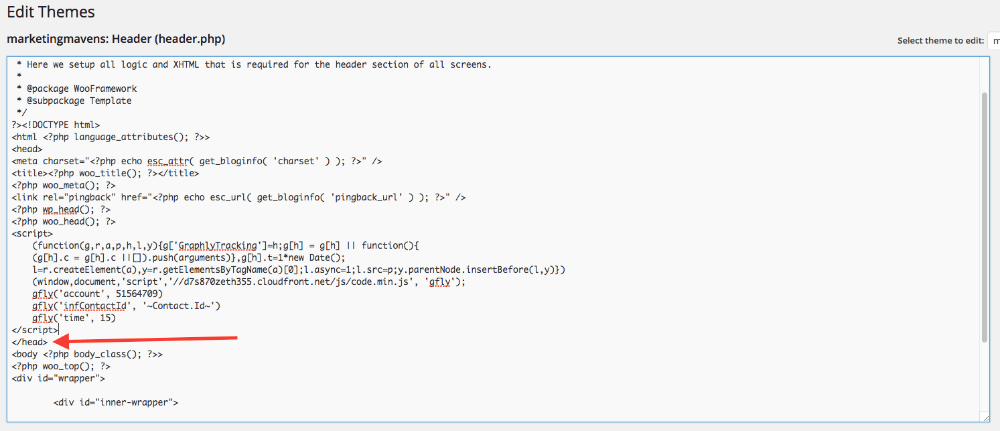
Paste the tracking script before the close of the head tag. The closing head tag will look like this: </head> If you don’t know where the tracking script is, you can click here to read about how to set up Graphly’s Web Tracker.

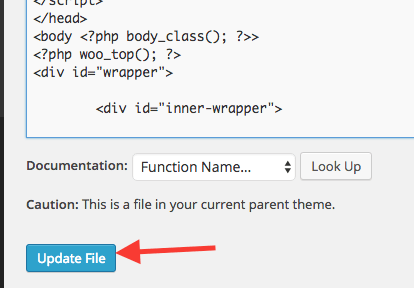
Then click on the “Update File” button at the bottom.

Now you’re done!
Relevant Articles
- How to Set Up and Configure Graphly’s Web Tracker
- How to set up Infusionsoft URL’s for Graphly’s Web Tracker
Create Your Free Graphly Dashboard
You don’t need to struggle to find the data you need from your Infusionsoft or Keap application. Create a free visual dashboard using the Graphly Lite plan. Using Graphly Lite, you get 1 user, 2 dashboards, and access to our 10 most widely used report templates. These templates include:
- Tags Applied
- Tags Applied Goal
- Leads
- Gross Revenue
- Appt | Note | Task Summary
- Email List Health
- Refunds
- Campaign Email Stats
- Text Widget Area
If you don’t already have a Graphly account, click here to get a Graphly Lite account so you can start making more informed decisions and grow your business.


