This article will instruct you on how to add the Graphly Web Tracker to your WebinarJam or EverWebinar pages, allowing you to track webinar visitors and gain insight into their visit.
Log in to WebinarJam/EverWebinar
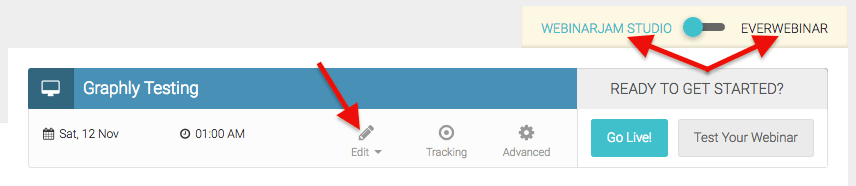
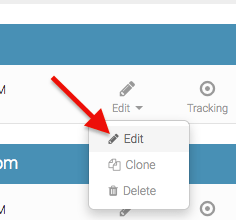
To begin, make sure you have WebinarJam or EverWebinar selected on the toggle. Then click Edit on the webinar you would like to add the tracking script to. Click the Edit option from the drop-down.
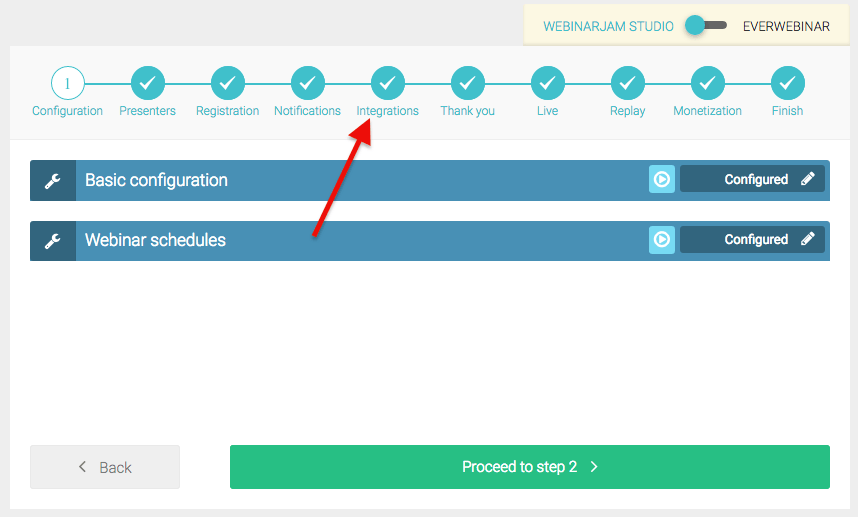
Navigate over to the Integrations section in the center of the modal.
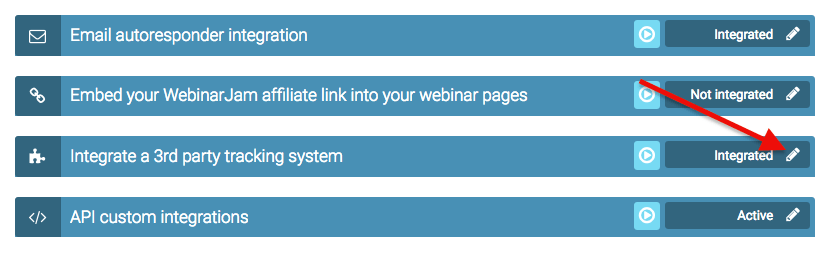
Click the Pencil Icon on the Integrate a 3rd party tracking system bar, which is the third option down.
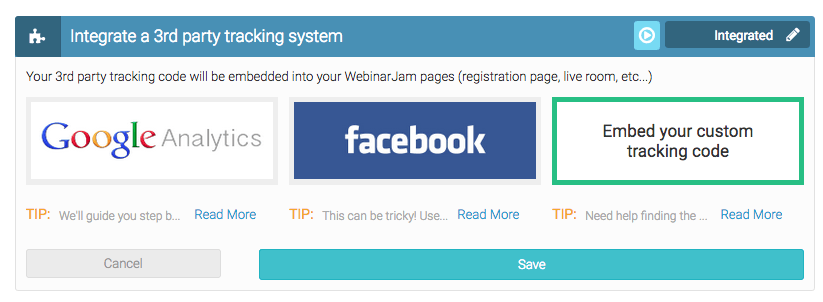
Then click the Embed your custom tracking code on the right.
Connect with Graphly’s Web Tracker
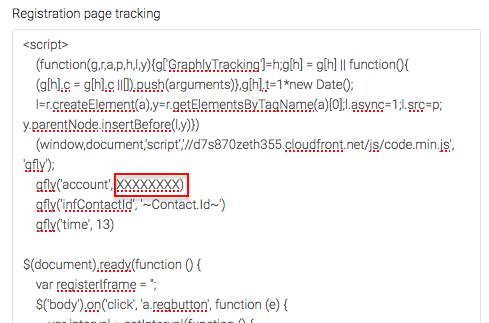
Place the following code into the Registration Page Tracking box and replace the eight X’s following account with your custom account code in your Graphly Tracking Script.
<script>
    (function(g,r,a,p,h,l,y){g['GraphlyTracking']=h;g[h] = g[h] || function(){
    (g[h].c = g[h].c ||[]).push(arguments)},g[h].t=1*new Date();
    l=r.createElement(a),y=r.getElementsByTagName(a)[0];l.async=1;l.src=p;y.parentNode.insertBefore(l,y)})
    (window,document,'script','//d7s870zeth355.cloudfront.net/js/code.min.js', 'gfly');
    gfly('account', XXXXXXXX)
    gfly('infContactId', '~Contact.Id~')
    gfly('time', 13)

$(document).ready(function () {
    var registerIframe = '';
    $('body').on('click', 'a.regbutton', function (e) {
        var interval = setInterval(function () {
            registerIframe = $('iframe#regpopFrame');
            if (registerIframe) {
                var formExists = registerIframe.contents().find('form[name="registerForm"]').length;
                if (formExists) {
                    var form = registerIframe.contents().find('form[name="registerForm"]');
                    form.submit(function (e) {
                        e.preventDefault()
                        var email = registerIframe.contents().find('input[name="email_address"]').val();
                        if (email.length > 5) {
                            gfly('infEmail', email)
                        }
                    });
                    clearInterval(interval)
                }
            }
        }, 100)
        setTimeout(function () {
            clearInterval(interval)
        }, 30000);
    })
})
</script>
Then copy the code you just edited and paste it into the rest of the boxes below the one you just adjusted. There should be 3 more.
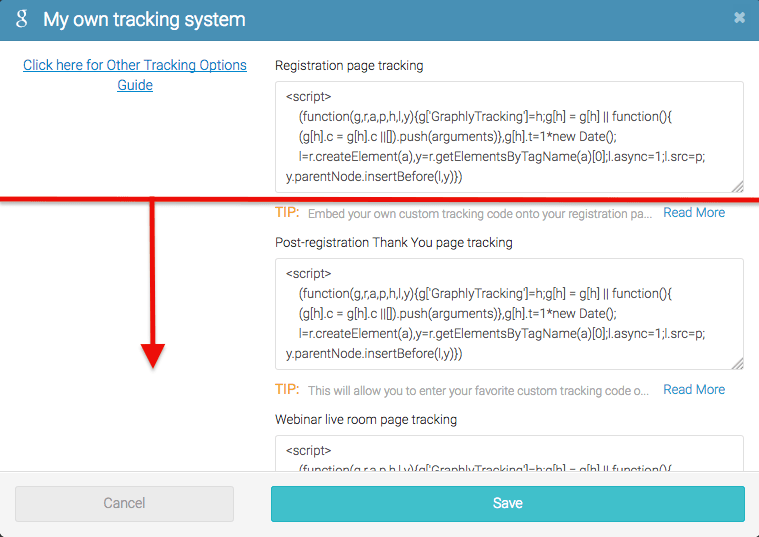
Lastly, click Save down at the bottom of the modal.

Congratulations! The Graphly Web Tracker should now be on all the pages associated with your Webinar, and you can begin to track webinar visitors.
Relevant Articles
- Overview of the Graphly Web Tracker
- How to use Graphly’s URL Builder to Track UTM Variables
- How to use Graphly’s Field Consolidator to Clean up Lead Sources
If you don’t already have a Graphly account, you can sign up for free here to get powerful Infusionsoft reporting.