This article covers integrating Graphly’s Web Tracker with SumoMe.
Script: gfly(‘infEmail’, {sumome-subscriber-email})
How to Set Up Web Tracker for SumoMe
SumoMe List Builder
To begin, get logged in to your SumoMe account. We will be covering the List Builder, but the same steps will also work for SumoMe Smart Bar, Welcome Mat, and Scroll Box.
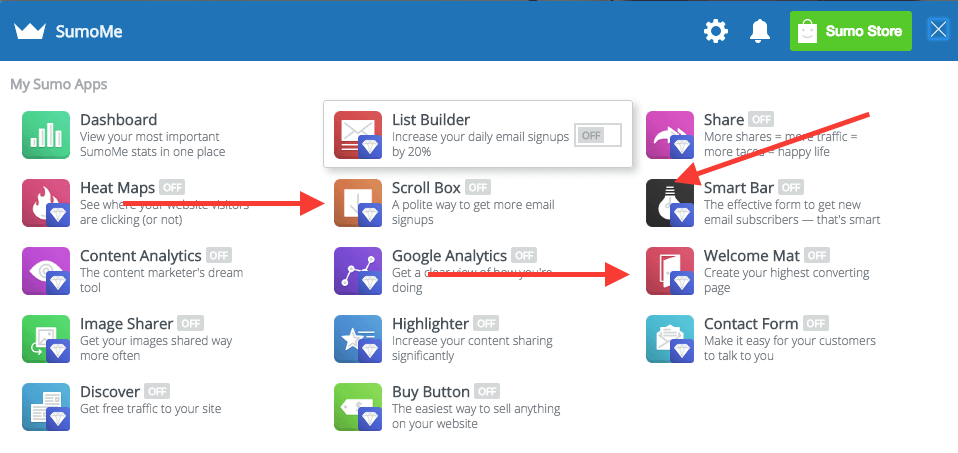
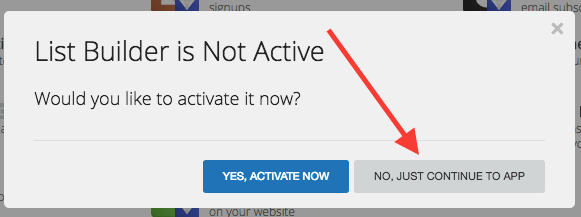
Go ahead and click on “List Builder“. A box will come up and ask you if you want to activate the List Builder. Click “No, Just Continue To App“.
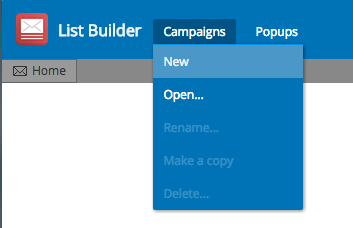
Here, you’ll need to click “Campaigns and New” to add a campaign. It’s important to note that you can edit an existing campaign if you want to.
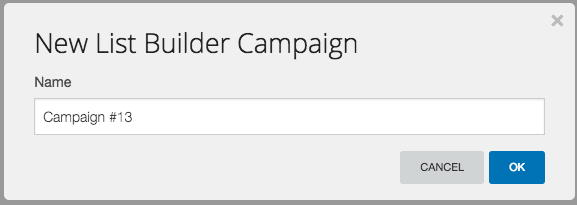
Once the option comes up, name the campaign and then click “Ok“.
Adding the Popup
From here, click on “Popups & A/B Tests” on the sidebar. You can find it on the left side of the window.
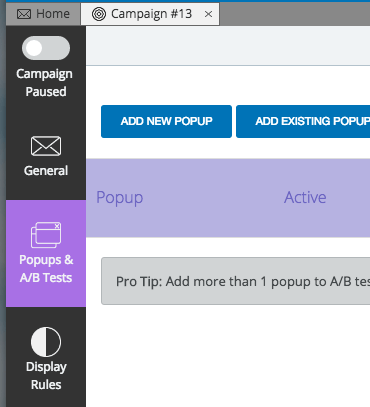
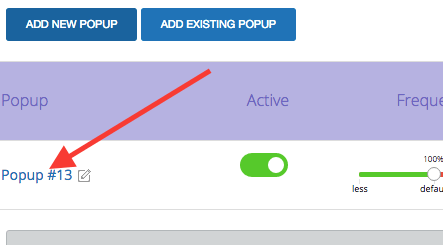
Click on “Add New Popup“. When the new popup appears, click on its name to edit it.
From this page, you can choose the design, heading, text, color, button text, and opt out text of your popup.
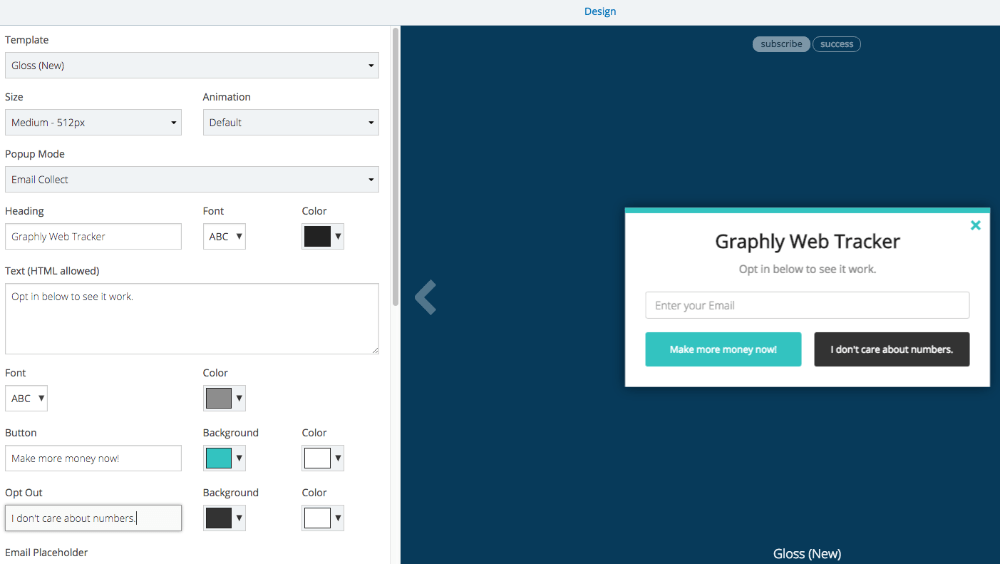
After you’re finished customizing, click the “Save” button in the bottom-right of the window.

Then click on “Fields” on the sidebar. You can make additions as needed here, but make sure that the Variable name stays, “email”, in all lowercase.

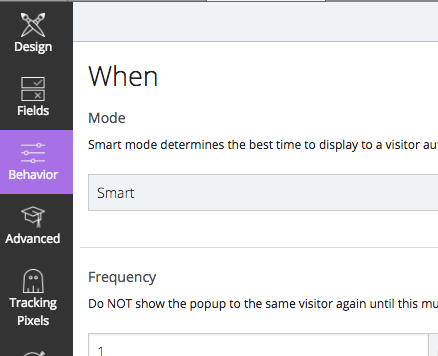
Now save any changes then click on “Behavior” on the sidebar.
Adding the Graphly Tracking Script
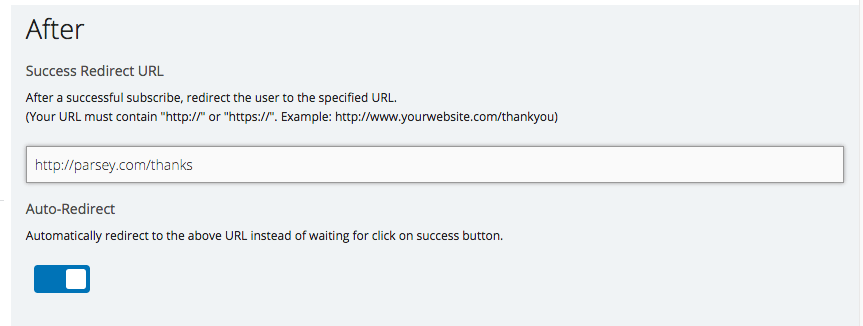
The important settings related to Graphly’s Web Tracker are on the right-hand side in SumoMe. First, paste in a thank-you page URL, while making sure Auto-Redirect is toggled ON.
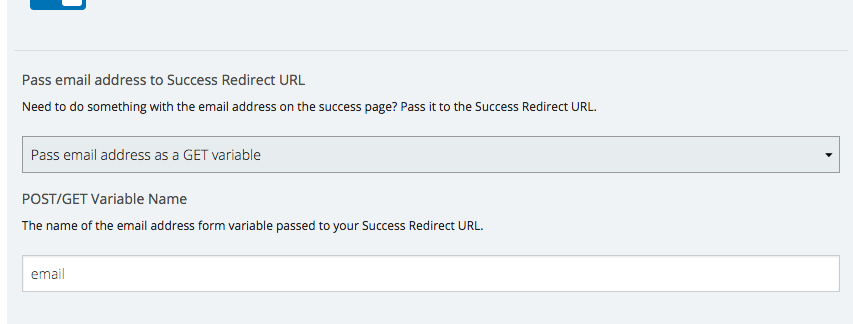
Below that, choose Pass email address as a GET variable from the dropdown menu. Keep the text in the field set to “email” in lowercase letters.
Then click “Save” at the bottom.

After that’s been saved, click on “Tracking Pixels” on the sidebar.

Paste the tracking script from your Graphly account into both of the boxes. If you don’t know how that’s setup click here for an explanation.

SumoMe gives you the option to inject the subscribers’ email, that is exactly what we want to do. You’ll need to make a small addition to the script in the bottom box right underneath the contact id line. Here’s the code you need to add: gfly(‘infEmail’, {sumome-subscriber-email})


After that, click the “Save” button. If you don’t have SumoMe Pro you’ll see a popup telling you to upgrade in order to use Tracking Pixels. That looks like this.

Now return to your campaign and make sure the popup is toggled to “Active“.

Then select Services on the sidebar and click on “InfusionSoft“.

Click “CONNECT“.

As long as you are logged into Infusionsoft, a popup will appear asking you to allow SumoMe access. Click on “Allow“.

Click “Save” at the bottom and then toggle the campaign to “Active“.

You’re good to go!


