
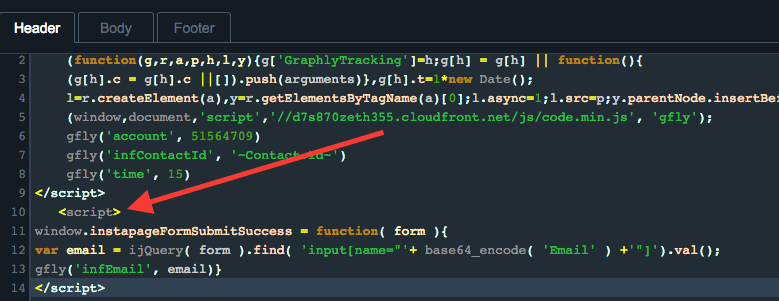
Script (Not Graphly’s Web Tracker Script):
<script>

window.instapageFormSubmitSuccess = function( form ){
var email = ijQuery( form ).find( 'input[name="'+ base64_encode( 'Email' ) +'"]').val();
gfly('infEmail', email)}

</script>
Setup Inside Instapage for Graphly’s Web Tracker
This article covers integrating Graphly’s Web Tracker with Instapage so that you can get a better idea on the performance of your site.
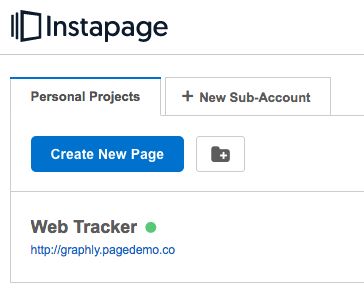
To begin, get logged into your Instapage account and navigate to any page that you would like the tracker to be put on.
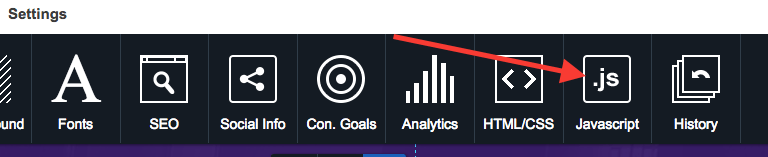
At the top of this page, you should see a “Settings” tab. Go ahead and click on that.

From here, look to the top of the screen again and click on “Javascript“. Look for the box with “.js” written inside.
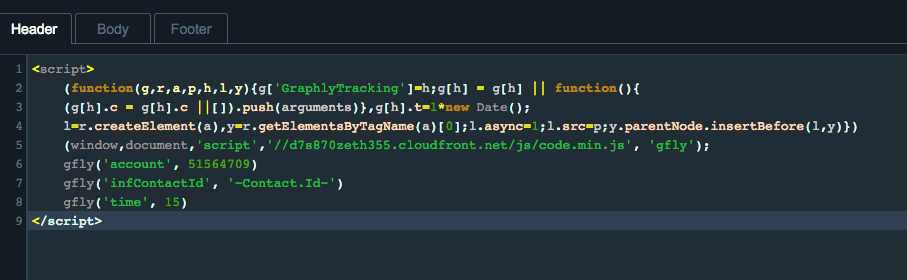
In here, paste the Graphly tracking script. If you don’t have the tracking script, look to the bottom of this page under Relevant Articles. There will be a link for How to Set Up and Configure Graphly’s Web Tracker
Then click the “Done” button twice in the top-right.
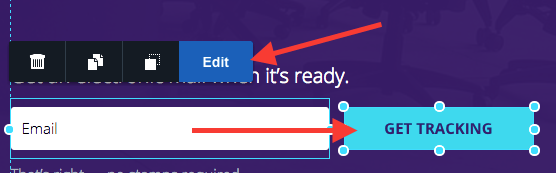
Now click on your form submit button and then click “Edit“.
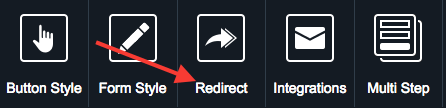
Now you should have already clicked on Integrations and gone through the steps to integrate with Infusionsoft, so click on “Redirect“.
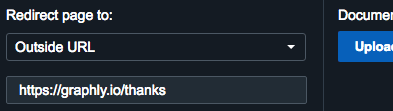
Change the dropdown menu to Outside URL and paste in your thank-you page URL.
If you’re using a page on your site, you just need to make sure you have the Graphly script embedded in the head of that page. Most lead capture platforms have a checkbox here to send the field values as parameters to the thank you page. While Instapage doesn’t provide an easy option for this, it’s still doable. We’ve written an additional javascript that can easily be added to pull this off.
Click the “Done” button and head back over to the Javascript panel. Paste the script found at the top of this page right underneath the tracking script.
After that click “Done” and then “Save“.

Then click “Publish Changes” and “Yes“.


Now that you’ve set up web tracking for Instapage, try out some of our web tracking reports below!