
This article will help you understand how to add users to your Graphly account, and covers the different types of user permissions.
Step 1: Access the Users Page
Select the settings button, which is in the right hand corner that is shaped like a gear.
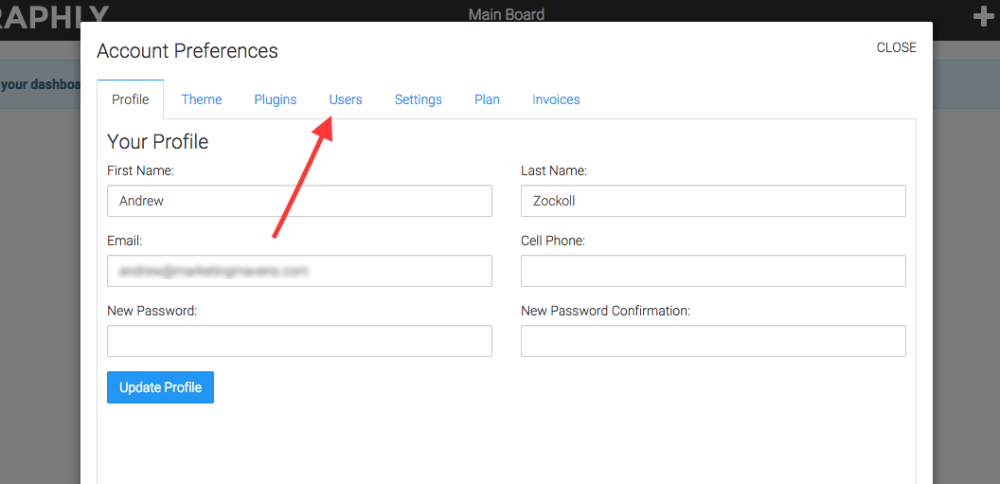
Click Account, then select the Users tab.
Step 2: Invite Users
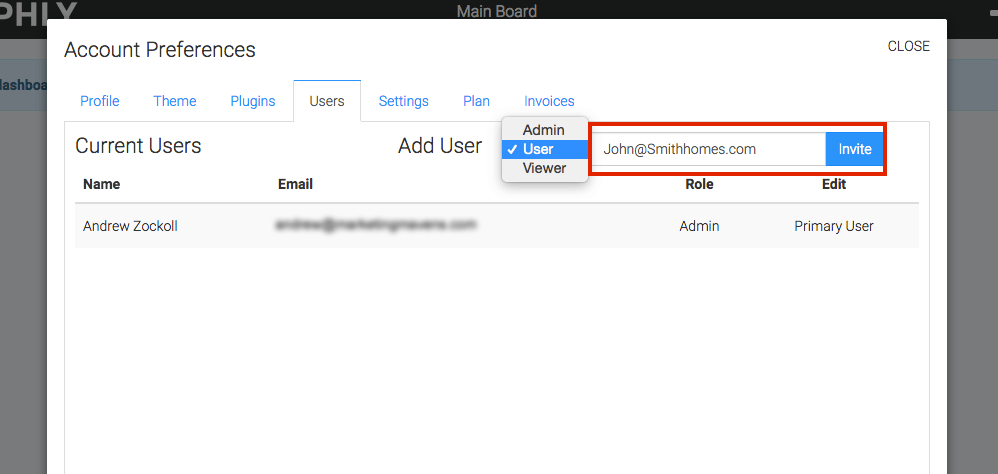
Under the Users tab you should see a space off to the right that lets you enter the email address of the person you would like to add as a user. Once you enter email address select which kind of user (Admin, User, or Viewer) they will be and click Invite. The type of user can always be changed later.
- Viewer: Can only access boards that you share with them. Are unable to create their own boards or reports.
- User: Can create their own boards and reports.
- Admin: Can create their own boards and reports, access payment information, access the Web Tracker, and manage users.
Relevant Articles
- Share a Dashboard With Other Users On Your Graphly Account
- How to Create a Public Dashboard for Non-Graphly Users
- How to Switch Between Graphly Dashboards
If you don’t already have a Graphly account, you can sign up for free here to get powerful Infusionsoft reporting.